
Part 1: Hyperlinks
Week 5 — Lesson 3 | CI1000: Computer Basics for Healthcare Professionals
Learning Objectives
By the end of this lesson you will be able to:
- Create and edit hyperlinks within a Word document to reference external sources and internal document locations.
- Identify Word accessibility features including alt text, Immersive Reader, dictation, and the Accessibility Checker.
- Apply styles (Heading 1, Heading 2, Normal) to structure a long document and generate a table of contents.
- Use keyboard shortcuts to perform common Word operations efficiently.
Part 1: Hyperlinks
A hyperlink is clickable text or an image that takes the reader to another location, such as a website, an email address, or a different section within the same document. In healthcare documentation, hyperlinks connect your documents to online resources, reference materials, and organizational websites, saving readers the effort of manually searching for those resources.
Inserting a Hyperlink to a Website
To insert a hyperlink in Microsoft Word, follow these steps:
- Select the text you want to turn into a hyperlink. This text is called the display text.
- Press Ctrl + K (or select Insert, then Link from the Ribbon).
- In the Insert Hyperlink dialog box, type or paste the web address (URL) in the Address field.
- Select OK to create the hyperlink. The display text will now appear underlined and in a different color, indicating it is clickable.
Writing Descriptive Link Text
One of the most important rules for hyperlinks is to use descriptive display text rather than raw URLs or vague phrases. This practice is essential for accessibility because screen readers announce the link text to visually impaired users.
- Avoid: "Click here" or "https://support.microsoft.com/en-us/office/create-or-edit-a-hyperlink-5d8c0804"
- Use instead: "Create or edit a hyperlink in Microsoft Word"
The descriptive version tells the reader exactly where the link leads without requiring them to hover over it or listen to a long URL being read aloud.
Editing and Removing Hyperlinks
To edit a hyperlink, right-click the linked text and select Edit Hyperlink. You can change the URL, the display text, or both. To remove a hyperlink entirely (converting it back to plain text), right-click the link and select Remove Hyperlink.
Healthcare Connection: In a patient education handout about managing diabetes, you might include hyperlinks to trusted resources such as the American Diabetes Association, the CDC's diabetes prevention program, and your clinic's patient portal. Using descriptive link text such as "American Diabetes Association: Living with Type 2 Diabetes" rather than a raw URL makes the document more professional and more accessible to all patients, including those using assistive technology.
Part 2: Styles and Document Structure
In earlier weeks, you formatted documents by manually selecting fonts, sizes, and colors. While that approach works for short documents, it becomes time-consuming and inconsistent in longer documents. Styles solve this problem by letting you apply a predefined set of formatting options with a single click.
What Are Styles?
A style is a named collection of formatting attributes, such as font, size, color, spacing, and alignment. Word comes with built-in styles including Normal (for body text), Heading 1 (for main sections), Heading 2 (for subsections), and Heading 3 (for sub-subsections).
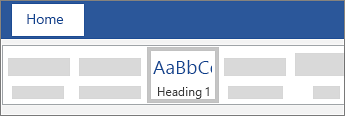
To apply a style, place your cursor in a paragraph and select the desired style from the Styles gallery on the Home tab. The entire paragraph immediately adopts the formatting defined by that style.
Why Styles Matter
Styles provide three major benefits that make them essential for professional document creation:
- Consistency -- Every section heading looks the same throughout the document. If you change the style definition, all text using that style updates automatically.
- Navigation -- Word's Navigation Pane (press Ctrl + F, then select the Headings tab) creates an automatic document outline from your heading styles. You can click any heading in the pane to jump directly to that section.
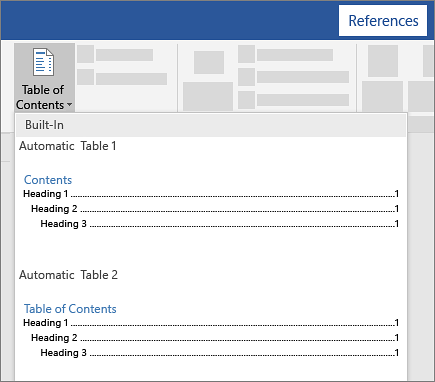
- Table of Contents -- Word can automatically generate a Table of Contents from your heading styles. Select References, then Table of Contents on the Ribbon, and Word builds a clickable TOC based on your Heading 1, 2, and 3 text.
Generating a Table of Contents
To create an automatic Table of Contents in your document:
- Apply Heading 1, Heading 2, and Heading 3 styles to your section headings throughout the document.
- Place your cursor where you want the Table of Contents to appear (typically at the beginning of the document).
- Select the References tab on the Ribbon.
- Select Table of Contents and choose a built-in style.
- Word generates a formatted, clickable TOC that links to each heading.
When you add, remove, or rename headings later, right-click the Table of Contents and select Update Field to refresh it.
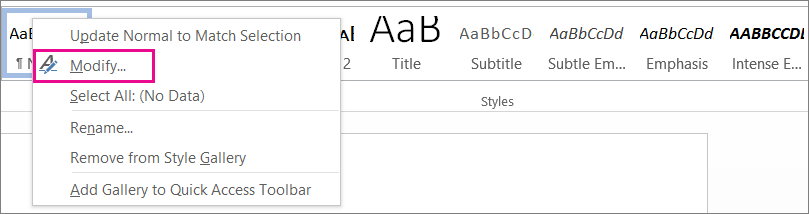
Pro Tip: If you want to change how a heading style looks (for example, changing Heading 1 from blue to dark gray), right-click the style in the Styles gallery and select Modify. Every heading in the document that uses that style will update automatically. This is far more efficient than selecting each heading individually and changing its formatting.
Part 3: Accessibility in Word
Accessibility means designing documents so that everyone can use them, including people with visual impairments, hearing loss, motor disabilities, or cognitive differences. In healthcare, creating accessible documents is not just good practice, it is often a legal requirement under the Americans with Disabilities Act (ADA) and Section 508 of the Rehabilitation Act.
Alt Text for Images
When you insert an image into a Word document, you should add alternative text (alt text), a brief description of what the image shows. Screen readers read this description aloud to users who cannot see the image. To add alt text, right-click the image, select Edit Alt Text, and write a concise, descriptive sentence.
For example, if you insert an image of a blood pressure monitor, good alt text would be: "Digital blood pressure monitor displaying a reading of 120/80 mmHg." Avoid vague descriptions such as "image" or "picture."
The Accessibility Checker
Word includes a built-in Accessibility Checker that scans your document for potential issues and provides suggestions for fixing them. To run the Accessibility Checker, select Review, then Check Accessibility on the Ribbon (or select File, then Info, then Check for Issues, then Check Accessibility).
The Accessibility Checker identifies issues in three categories:
- Errors -- Critical issues that make the document difficult or impossible for people with disabilities to use (such as missing alt text on images).
- Warnings -- Potential issues that may cause difficulties (such as unclear hyperlink text).
- Tips -- Suggestions for improving the reading experience (such as using high-contrast colors).
Additional Accessibility Tools
Immersive Reader
Immersive Reader is a built-in tool that makes documents easier to read. It can increase text spacing, change the background color, highlight parts of speech, and read the document aloud with a natural-sounding voice. Access it under View, then Immersive Reader. This tool is valuable for students with dyslexia or reading difficulties, and it is also useful for proofreading your own documents by listening to them being read aloud.
Dictation (Voice-to-Text)
Dictation allows you to speak and have Word convert your speech to text. Access it from the Home tab by selecting the Dictate button (microphone icon). Dictation is useful for people with motor disabilities who have difficulty typing, and it can also be a faster way to draft first versions of documents. Speak clearly and include punctuation commands such as "period," "comma," and "new paragraph."
Read Aloud
Read Aloud reads your document text using a natural-sounding voice. Access it under Review, then Read Aloud, or press Ctrl + Alt + Space. You can adjust the reading speed and choose from several voice options. This feature is excellent for proofreading, as hearing your text read aloud often reveals errors that your eyes miss when reading silently.
Healthcare Connection: Healthcare organizations create documents that serve diverse populations, including patients and staff with varying abilities. A patient education handout without alt text on its images is inaccessible to a visually impaired patient using a screen reader. A policy document without heading styles is difficult to navigate for anyone using assistive technology. Running the Accessibility Checker before finalizing any healthcare document should become a standard part of your workflow.
Knowledge Check
Arrange these accessibility remediation steps in the correct order. Click two items to swap their positions, then check your answer.
Part 4: Keyboard Shortcuts Reference
Keyboard shortcuts are key combinations that let you perform actions without using the mouse or navigating through the Ribbon. Mastering shortcuts saves time, reduces repetitive strain, and helps you work more efficiently in a fast-paced healthcare office environment.
Throughout this course, you have used many of these shortcuts in context. This section brings them together in one comprehensive reference.
Essential Word Shortcuts
| Shortcut | Action | Healthcare Use Example |
|---|---|---|
Ctrl + S |
Save the document | Save progress on a clinical report every few minutes |
Ctrl + Z |
Undo the last action | Reverse an accidental deletion in a patient letter |
Ctrl + Y |
Redo the last undone action | Restore formatting you accidentally undid |
Ctrl + C |
Copy selected text | Copy a patient's insurance ID to multiple forms |
Ctrl + X |
Cut selected text | Move a paragraph to a better location in a memo |
Ctrl + V |
Paste clipboard contents | Paste a copied address into a referral letter |
Ctrl + B |
Toggle bold formatting | Bold allergy warnings in a patient chart note |
Ctrl + I |
Toggle italic formatting | Italicize medication names per style guidelines |
Ctrl + U |
Toggle underline formatting | Underline a policy section title for emphasis |
Ctrl + A |
Select all text in the document | Select everything to change the font across a long report |
Ctrl + F |
Open Find pane | Search for a specific diagnosis code in a long document |
Ctrl + H |
Open Find and Replace | Replace an old provider name throughout a policy manual |
Ctrl + K |
Insert or edit a hyperlink | Add a link to the CDC website in a handout |
Ctrl + Enter |
Insert a page break | Start a new section on a fresh page in a report |
Ctrl + P |
Print the document | Print patient consent forms for the front desk |
F12 |
Save As (new name or format) | Save a Word document as PDF for email distribution |
Try It Yourself: Open a Word document and practice each shortcut from the table above. Try selecting a paragraph with Ctrl + A, copying it with Ctrl + C, and pasting it below with Ctrl + V. Then use Ctrl + Z to undo the paste. The more you practice these shortcuts, the more natural they will become in your daily workflow.
Click the card to flip it
Part 5: Course Capstone: Your Word Skills Portfolio
Over the past five weeks, you have built a comprehensive set of Microsoft Word skills that will serve you throughout your healthcare career. This final section brings everything together and gives you a chance to reflect on how far you have come since Week 1.
Your Five-Week Word Skills Journey
Week 1: Getting Started
- Opened and navigated the Word interface (Ribbon, Quick Access Toolbar, Status Bar)
- Created new documents from blank pages and templates
- Entered, selected, and navigated text using keyboard and mouse techniques
- Used Cut, Copy, Paste, Undo, and Redo for basic editing
- Saved documents in multiple formats (.docx, .pdf, .rtf)
Week 2: Formatting Foundations
- Applied character formatting: fonts, sizes, bold, italic, underline, color
- Applied paragraph formatting: alignment, spacing, indentation, line spacing
- Created bulleted and numbered lists
- Adjusted page margins and orientation
- Used Print Preview to check document appearance before printing
Week 3: Tables and Page Layout
- Inserted and formatted tables for organized data presentation
- Added headers, footers, and page numbers
- Configured page borders and watermarks
- Used columns for newsletter-style layouts
- Applied page breaks to control document flow
Week 4: Document Elements
- Inserted and formatted images with text wrapping options
- Used Spelling and Grammar checker and the Thesaurus
- Applied APA formatting for academic documents
- Used Track Changes for collaborative editing and review
- Added comments for feedback without modifying the original text
Week 5: Advanced Features
- Created and edited hyperlinks with descriptive display text
- Applied heading styles to structure documents and generate a Table of Contents
- Used the Accessibility Checker, Immersive Reader, Dictation, and Read Aloud
- Mastered keyboard shortcuts for efficient document workflow
- Used Find and Replace to make bulk changes across long documents
Your Word Skills Self-Assessment
As you review the checklist below, consider each skill honestly. The items you feel confident about are skills you can highlight on a resume or demonstrate in a job interview. The items you feel less sure about are opportunities for additional practice before your final assessment.
CI1000 Word Skills Checklist
- I can create a new document from a blank page or a template.
- I can save documents in .docx, .pdf, and .rtf formats, choosing the right format for the situation.
- I can format text with fonts, sizes, bold, italic, underline, and color.
- I can set paragraph alignment, spacing, and indentation.
- I can create and format tables for organized data presentation.
- I can add headers, footers, and page numbers.
- I can insert and format images with appropriate text wrapping and alt text.
- I can use Spelling and Grammar checker to catch errors before printing.
- I can format a document according to APA guidelines.
- I can create hyperlinks with descriptive display text.
- I can apply heading styles (Heading 1, Heading 2, Normal) to structure a long document.
- I can generate a Table of Contents from heading styles.
- I can run the Accessibility Checker and fix the issues it identifies.
- I can use Find and Replace to make bulk changes across a document.
- I can use at least 10 keyboard shortcuts from memory.
Next Steps: Continuing Your Microsoft Office Learning
This course has given you a strong foundation in Microsoft Word, but Word is just one application in the Microsoft Office suite. As you continue in your healthcare program and career, you may also use:
- Microsoft Excel -- For spreadsheets, data analysis, budgets, and patient tracking logs.
- Microsoft PowerPoint -- For presentations, training materials, and patient education slideshows.
- Microsoft Outlook -- For professional email communication, calendar management, and scheduling.
- Microsoft Teams -- For virtual meetings, team collaboration, and file sharing in healthcare organizations.
The skills you have built in Word, such as navigating the Ribbon, using keyboard shortcuts, and understanding formatting principles, transfer directly to these other applications. You are well prepared to continue growing your technology skills.
Key Takeaway: You started this course with little or no experience in Microsoft Word, and you are finishing it with the skills to create, format, and manage professional healthcare documents. Every skill you have learned, from pressing Ctrl + S to running the Accessibility Checker, is a skill that healthcare employers value. Carry this confidence forward as you continue your education and begin your career.
Knowledge Check
Lesson 5.3 Summary
- Hyperlinks connect your documents to external websites, email addresses, and internal document locations. Always use descriptive display text rather than raw URLs for accessibility.
- Styles (Heading 1, Heading 2, Normal) provide consistent formatting, enable Navigation Pane browsing, and allow automatic Table of Contents generation.
- Word's accessibility tools include alt text for images, the Accessibility Checker, Immersive Reader, Dictation, and Read Aloud. Running the Accessibility Checker should be a standard step before finalizing any healthcare document.
- Keyboard shortcuts (Ctrl + S, Ctrl + Z, Ctrl + C, Ctrl + V, Ctrl + F, Ctrl + K, F12, and others) save time and reduce mouse dependency in fast-paced office environments.
- Over five weeks, you built a complete Word skills portfolio: creating, formatting, structuring, reviewing, and exporting professional healthcare documents.
- The skills you developed in Word, including Ribbon navigation, keyboard shortcuts, and formatting principles, transfer directly to Excel, PowerPoint, Outlook, and other Microsoft Office applications.