
Part 1: Page Setup -- Orientation and Margins
Week 3 — Lesson 3 | CI1000: Computer Basics for Healthcare Professionals
Learning Objectives
By the end of this lesson you will be able to:
- Set page orientation, margins, and paper size for different document types.
- Apply paragraph formatting including alignment, indentation, and line spacing.
- Create and customize bulleted and numbered lists.
- Insert page breaks and section breaks to control document flow.
Part 1: Page Setup -- Orientation and Margins
Before you type a single word, professional document creation begins with page setup. The way you configure your page determines how your content fits on paper or screen, and in healthcare, the right setup can mean the difference between a form that prints cleanly and one that cuts off critical information at the margins.
Page Orientation
Word offers two page orientations:
- Portrait -- The default orientation. The page is taller than it is wide (8.5 inches wide by 11 inches tall). Portrait is used for the majority of healthcare documents, including patient letters, memos, intake forms, and clinical notes.
- Landscape -- The page is wider than it is tall (11 inches wide by 8.5 inches tall). Landscape works well for documents with wide tables or charts, such as staff scheduling grids, comparison charts, or wide data tables.
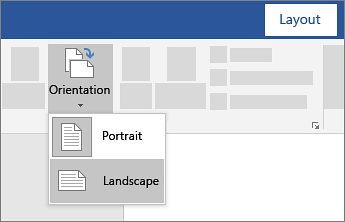
To change the orientation, navigate to the Layout tab on the Ribbon and select Orientation. Choose either Portrait or Landscape. The change applies to the entire document by default. If you need different orientations within the same document (for example, a portrait report with a landscape data table in the middle), you will need to insert section breaks, which are covered in Part 5 of this lesson.
Understanding Margins
Margins are the blank spaces between your text and the edges of the page. Word provides several predefined margin options, accessible from the Layout tab under Margins:
| Preset | Top/Bottom | Left/Right | Best Used For |
|---|---|---|---|
| Normal | 1 inch | 1 inch | Most documents. APA papers, letters, memos |
| Narrow | 0.5 inch | 0.5 inch | Forms and flyers where you need maximum print space |
| Moderate | 1 inch | 0.75 inch | Documents needing slightly more text width |
| Wide | 1 inch | 2 inches | Documents that need wide side margins for binding or notes |
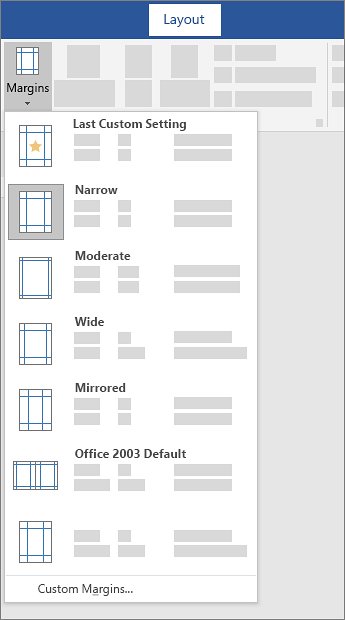
For custom margins, select Custom Margins at the bottom of the Margins menu. This opens the Page Setup dialog box where you can set exact measurements for each margin.
Pro Tip: Most printers cannot print all the way to the edge of the paper. If you set margins below 0.25 inches, Word will warn you that your content may be cut off during printing. For healthcare documents that will be printed, keep margins at 0.5 inches or wider to ensure nothing is lost.
Part 2: Paragraph Alignment
Paragraph alignment determines how text lines up between the left and right margins. Word offers four alignment options, each serving a different purpose in professional documents. Understanding when to use each alignment type is a skill you will apply daily in a healthcare office.
The Four Alignment Types
Left Align (Ctrl + L) is the default alignment in Word. Text lines up evenly along the left margin, with a ragged (uneven) right edge. This is the most readable alignment for body text and is used in the majority of healthcare documents.
When to use: Patient letters, clinical notes, memos, reports, email correspondence, and any general body text.
Center Align (Ctrl + E) centers each line of text between the left and right margins. Both edges are ragged. Center alignment is appropriate for titles, headings, and short decorative text, but should never be used for long paragraphs because the uneven edges make it difficult to read.
When to use: Document titles, cover page headings, invitation text, flyer headlines, and certificate text.
Right Align (Ctrl + R) lines up text evenly along the right margin, with a ragged left edge. It is rarely used for body text but is useful for specific elements that traditionally appear on the right side of a page.
When to use: Dates in formal letters, return addresses, page numbers in headers, and closing signatures.
Justify (Ctrl + J) spreads text evenly between both the left and right margins, creating straight edges on both sides. Word achieves this by adding extra space between words. Justified text gives documents a polished, newspaper-column appearance.
When to use: Formal reports, newsletters, patient education brochures, and documents where a polished, professional appearance is a priority. Avoid using justify for narrow columns, as it can create awkward gaps between words.
Healthcare Connection: When formatting a patient referral letter, use left alignment for the body text, right alignment for the date and your return address at the top, and center alignment for the clinic name on letterhead. This combination creates a professional document that follows standard business letter conventions used across medical offices.
Part 3: Indentation and Line Spacing
Indentation and line spacing control the visual structure of your paragraphs. Proper use of these settings makes documents easier to read and helps distinguish between different types of content. In academic work and healthcare documentation, specific indentation and spacing requirements are common, especially when following APA format.
Types of Indentation
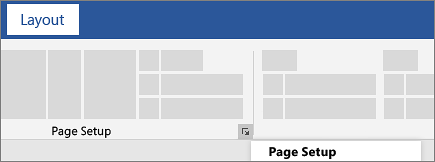
Word supports several indentation types, all accessible from the Home tab (Paragraph group) or the Layout tab (Paragraph section). You can also access detailed settings through the Paragraph dialog box (click the small arrow in the lower-right corner of the Paragraph group).
First-Line Indent
A first-line indent shifts only the first line of a paragraph to the right. This is the standard for APA-formatted papers, where each paragraph begins with a 0.5-inch first-line indent. It visually separates paragraphs without adding extra blank lines.
How to apply: Open the Paragraph dialog box. Under the Indentation section, set the Special dropdown to "First line" and enter 0.5 inches. Alternatively, place your cursor at the beginning of the paragraph and press Tab, which applies a 0.5-inch first-line indent by default.
Hanging Indent
A hanging indent keeps the first line at the left margin while indenting all subsequent lines. This is required for APA reference lists and bibliographies. Each reference entry starts at the left margin, and any continuation lines are indented 0.5 inches.
How to apply: In the Paragraph dialog box, set the Special dropdown to "Hanging" and enter 0.5 inches. You can also use the keyboard shortcut Ctrl + T to apply a hanging indent quickly.
Left and Right Indents
Left and right indents shift the entire paragraph inward from one or both margins. This is commonly used for block quotes (long quotations of 40 or more words in APA format), where the entire paragraph is indented 0.5 inches from the left margin.
How to apply: On the Layout tab, use the Indent Left and Indent Right fields in the Paragraph group. You can also use the Increase Indent and Decrease Indent buttons on the Home tab.
Line Spacing
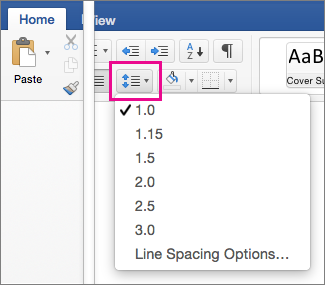
Line spacing controls the vertical distance between lines of text within a paragraph. Word offers several options through the Line and Paragraph Spacing button on the Home tab:
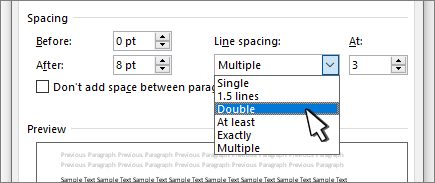
| Spacing | Description | Common Use |
|---|---|---|
| Single (1.0) | Minimum spacing. Lines are close together. | Business letters, forms, flyers |
| 1.15 | Word's default. Slightly more open than single. | General documents, office memos |
| 1.5 | 50% more space than single. Good readability. | Draft reports, patient education materials |
| Double (2.0) | Twice the spacing of single. Maximum readability. | APA papers, academic assignments |
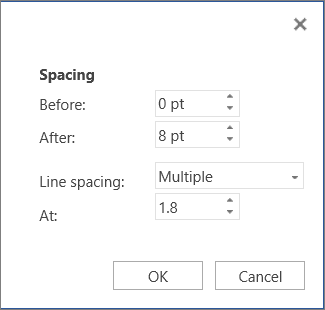
Paragraph Spacing (Before and After)
In addition to line spacing within paragraphs, you can control the space between paragraphs. This is set through the Before and After fields in the Paragraph group on the Layout tab, or in the Paragraph dialog box.
By default, Word adds 8 points of space after each paragraph. You can increase or decrease this value. Setting "After" to 12 points creates a clear visual separation between paragraphs without needing to press Enter twice (which creates uneven spacing and is considered poor formatting practice).
Key Takeaway: Never press Enter twice to create space between paragraphs. Instead, use the paragraph spacing settings (Before and After) to control the gap precisely. This produces consistent, professional-looking documents and makes global formatting changes much easier.
Part 4: Lists -- Bulleted and Numbered
Lists are one of the most frequently used formatting features in healthcare documents. Procedure checklists, medication lists, patient instructions, and office policies all rely on lists to present information clearly and concisely. Word makes it easy to create and customize both bulleted and numbered lists.
When to Use Each Type
- Bulleted lists -- Use when the order of items does not matter. Bullets are ideal for listing symptoms, equipment, team members, or options where no sequence is implied.
- Numbered lists -- Use when the order matters. Numbered lists are essential for step-by-step procedures, instructions, prioritized items, and any content where sequence is critical.
Creating Lists
To create a list, you have three options:
- Click the button first. On the Home tab, click the Bullets or Numbering button in the Paragraph group, then start typing. Each time you press Enter, Word adds a new list item.
- Type first, then convert. Type your items (one per line), select all the text, then click the Bullets or Numbering button to convert them into a list.
- Auto-list. Type an asterisk (*) or a dash (-) followed by a space to start a bulleted list automatically. Type "1." followed by a space to start a numbered list. Word recognizes these patterns and creates the list for you.
To end a list, press Enter twice, or press Enter once and then click the Bullets or Numbering button to toggle it off.
Customizing Lists
You can change the bullet character or numbering style by clicking the small dropdown arrow next to the Bullets or Numbering button. Word provides a library of options, and you can define custom characters through Define New Bullet. For numbered lists, you can choose from formats such as 1, 2, 3 or a, b, c or I, II, III.
Multi-Level Lists
Multi-level lists (also called outline lists) combine multiple levels of indentation. They are useful for detailed procedure documents, policy manuals, and outlines. To create a multi-level list, click the Multilevel List button on the Home tab. To move an item to a deeper level, press Tab. To move it back up, press Shift + Tab.
Healthcare Connection: Imagine you are creating a patient discharge checklist for a medical office. A numbered list ensures that the front desk staff completes each step in the correct order: (1) verify the patient's follow-up appointment, (2) provide printed discharge instructions, (3) confirm the patient has prescriptions, (4) collect co-payment, (5) update the patient record. If any step were missed or completed out of order, it could delay the patient's departure or compromise their care plan.
Knowledge Check
Part 5: Page Breaks and Section Breaks
As your documents grow beyond a single page, you need tools to control where one page ends and the next begins. Word provides two features for this purpose: page breaks and section breaks. Understanding the difference between them is essential for creating well-structured, multi-page healthcare documents.
Page Breaks
A page break forces the text after it to start on a new page. This is the most common way to control page flow. Use a page break when you want to start a new chapter, section, or distinct portion of your document on a fresh page.
How to insert a page break:
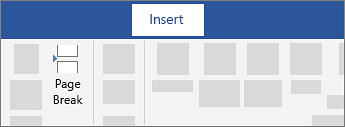
- Keyboard shortcut: Press Ctrl + Enter. This is the fastest method and the one you will use most often.
- Ribbon method: Go to the Insert tab and select Page Break.
A page break does not change any formatting settings. It simply moves everything after the break to the top of the next page. If you add or remove text before the break, the content after the break stays on its new page.
Pro Tip: Never press Enter repeatedly to push text to a new page. This is a common beginner mistake that creates documents that break unpredictably when text is added or removed. Always use Ctrl + Enter to insert a proper page break. Your documents will be more reliable, and your formatting will survive edits gracefully.
Section Breaks
Section breaks are more powerful than page breaks because they divide your document into independent sections, each of which can have its own formatting. This means you can have different margins, orientations, headers, footers, and page numbering in different parts of the same document.
To insert a section break, go to the Layout tab, select Breaks, and choose from the following types:
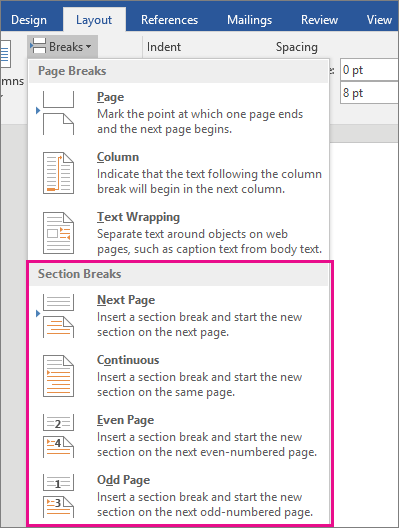
| Break Type | What It Does | Healthcare Use Case |
|---|---|---|
| Next Page | Starts the new section on the next page | Separating a portrait cover letter from a landscape data table |
| Continuous | Starts the new section on the same page | Switching from one column to two columns mid-page for a newsletter |
| Even Page | Starts the new section on the next even-numbered page | Ensuring chapters begin on left-facing pages in printed manuals |
| Odd Page | Starts the new section on the next odd-numbered page | Ensuring chapters begin on right-facing pages in printed manuals |
When to Use Each
The rule is straightforward: use a page break when you just need content to start on a new page with the same formatting. Use a section break when you need to change the formatting of a specific part of the document, such as switching from portrait to landscape, changing margins, or starting a different header or footer.
In a healthcare setting, section breaks are especially useful for multi-part reports. For example, a quality improvement report might have the following:
- A portrait cover page with wide margins and a centered title
- A portrait body section with normal margins and left-aligned text
- A landscape appendix with narrow margins containing a wide data table
Each of these sections requires different formatting, and section breaks make it possible within a single document.
Knowledge Check
Click an item on the left, then click its match on the right.
Lesson 3.3 Summary
- Page setup begins with orientation (Portrait for most documents, Landscape for wide tables) and margins (Normal at one inch is the default for letters, memos, and APA papers).
- Paragraph alignment controls how text lines up between margins: Left (Ctrl + L) for body text, Center (Ctrl + E) for titles, Right (Ctrl + R) for dates and signatures, Justify (Ctrl + J) for formal reports.
- Indentation types include first-line (for APA paragraphs), hanging (for reference lists), and left/right (for block quotes). Access all settings through the Paragraph dialog box.
- Line spacing controls the distance between lines within a paragraph: 1.0 for letters, 1.15 for general documents, 2.0 for APA papers. Use paragraph spacing (Before/After) to control gaps between paragraphs instead of pressing Enter twice.
- Bulleted lists are for unordered items; numbered lists are for sequential steps. Use multi-level lists for detailed outlines and procedures.
- Page breaks (Ctrl + Enter) move content to the next page. Section breaks allow different formatting in different parts of the same document, such as mixing portrait and landscape orientations.
- Never press Enter repeatedly to push text to a new page. Always use a proper page break for reliable, professional formatting.